Basics
Organising Data
Data Structure Overview
Data in MyTardis is organised into a uniform hierarchy, which includes Experiments, Datasets and Data Files. Experiments are at the top of the hierarchy and can contain multiple Datasets. Similarly, Datasets can contain multiple Data Files. The hierarchy can be thought of like a directory structure on a typical PC (Fig. 1) in which a the Experiment directory contains multiple Dataset directories, which in turn contain multiple Data Files.
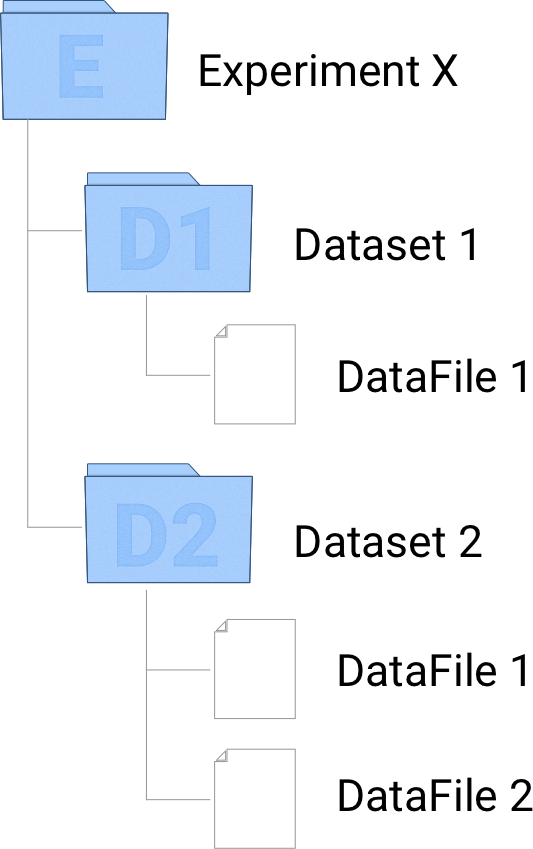
Fig. 1. Data hierarchy in MyTardis
Creating Experiments
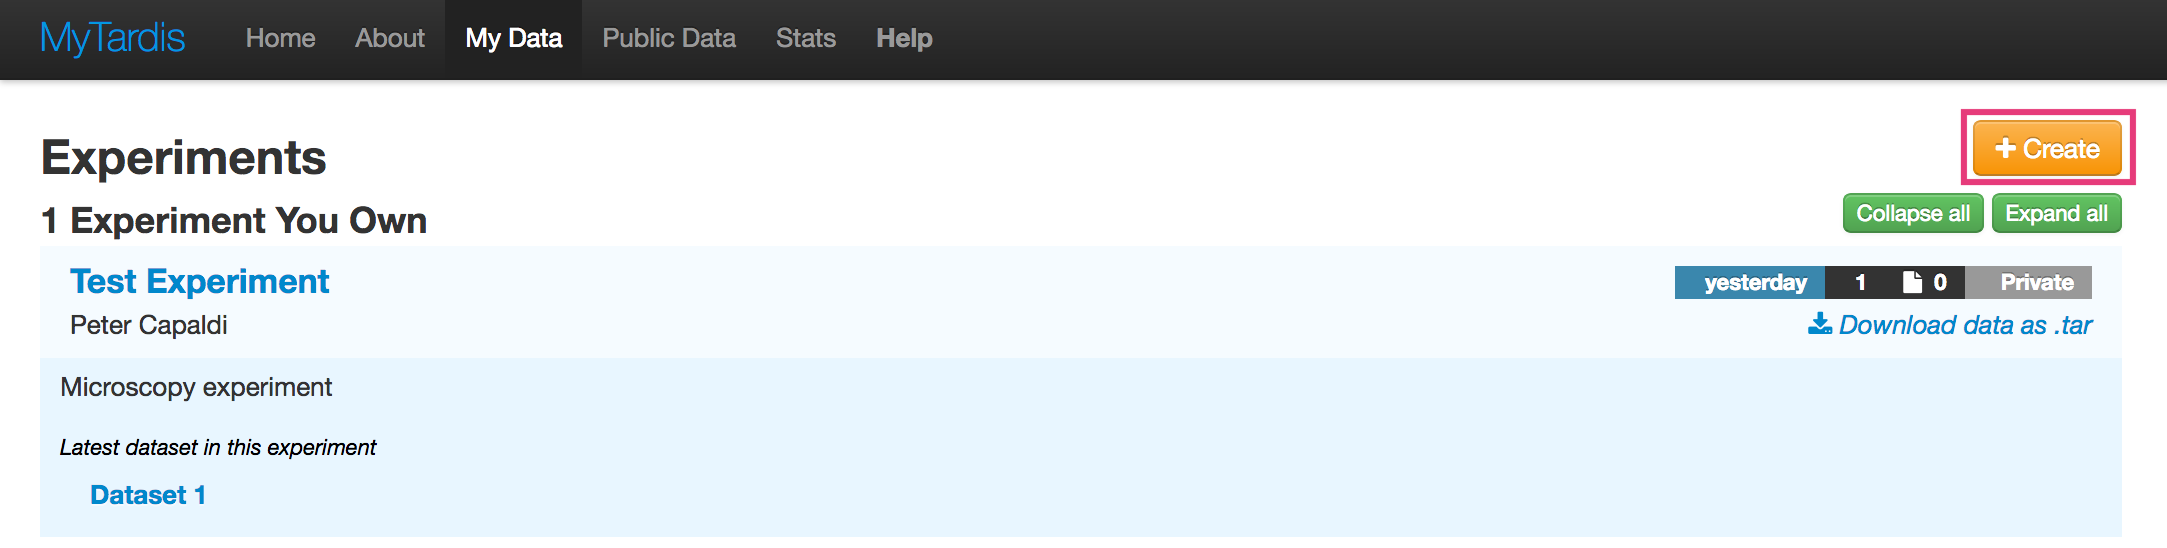
Navigate to the My Data page.
Click on the Create button to the right of the page.
Fill in the ‘Create Experiment’ form. Requires at least a Title and one author.
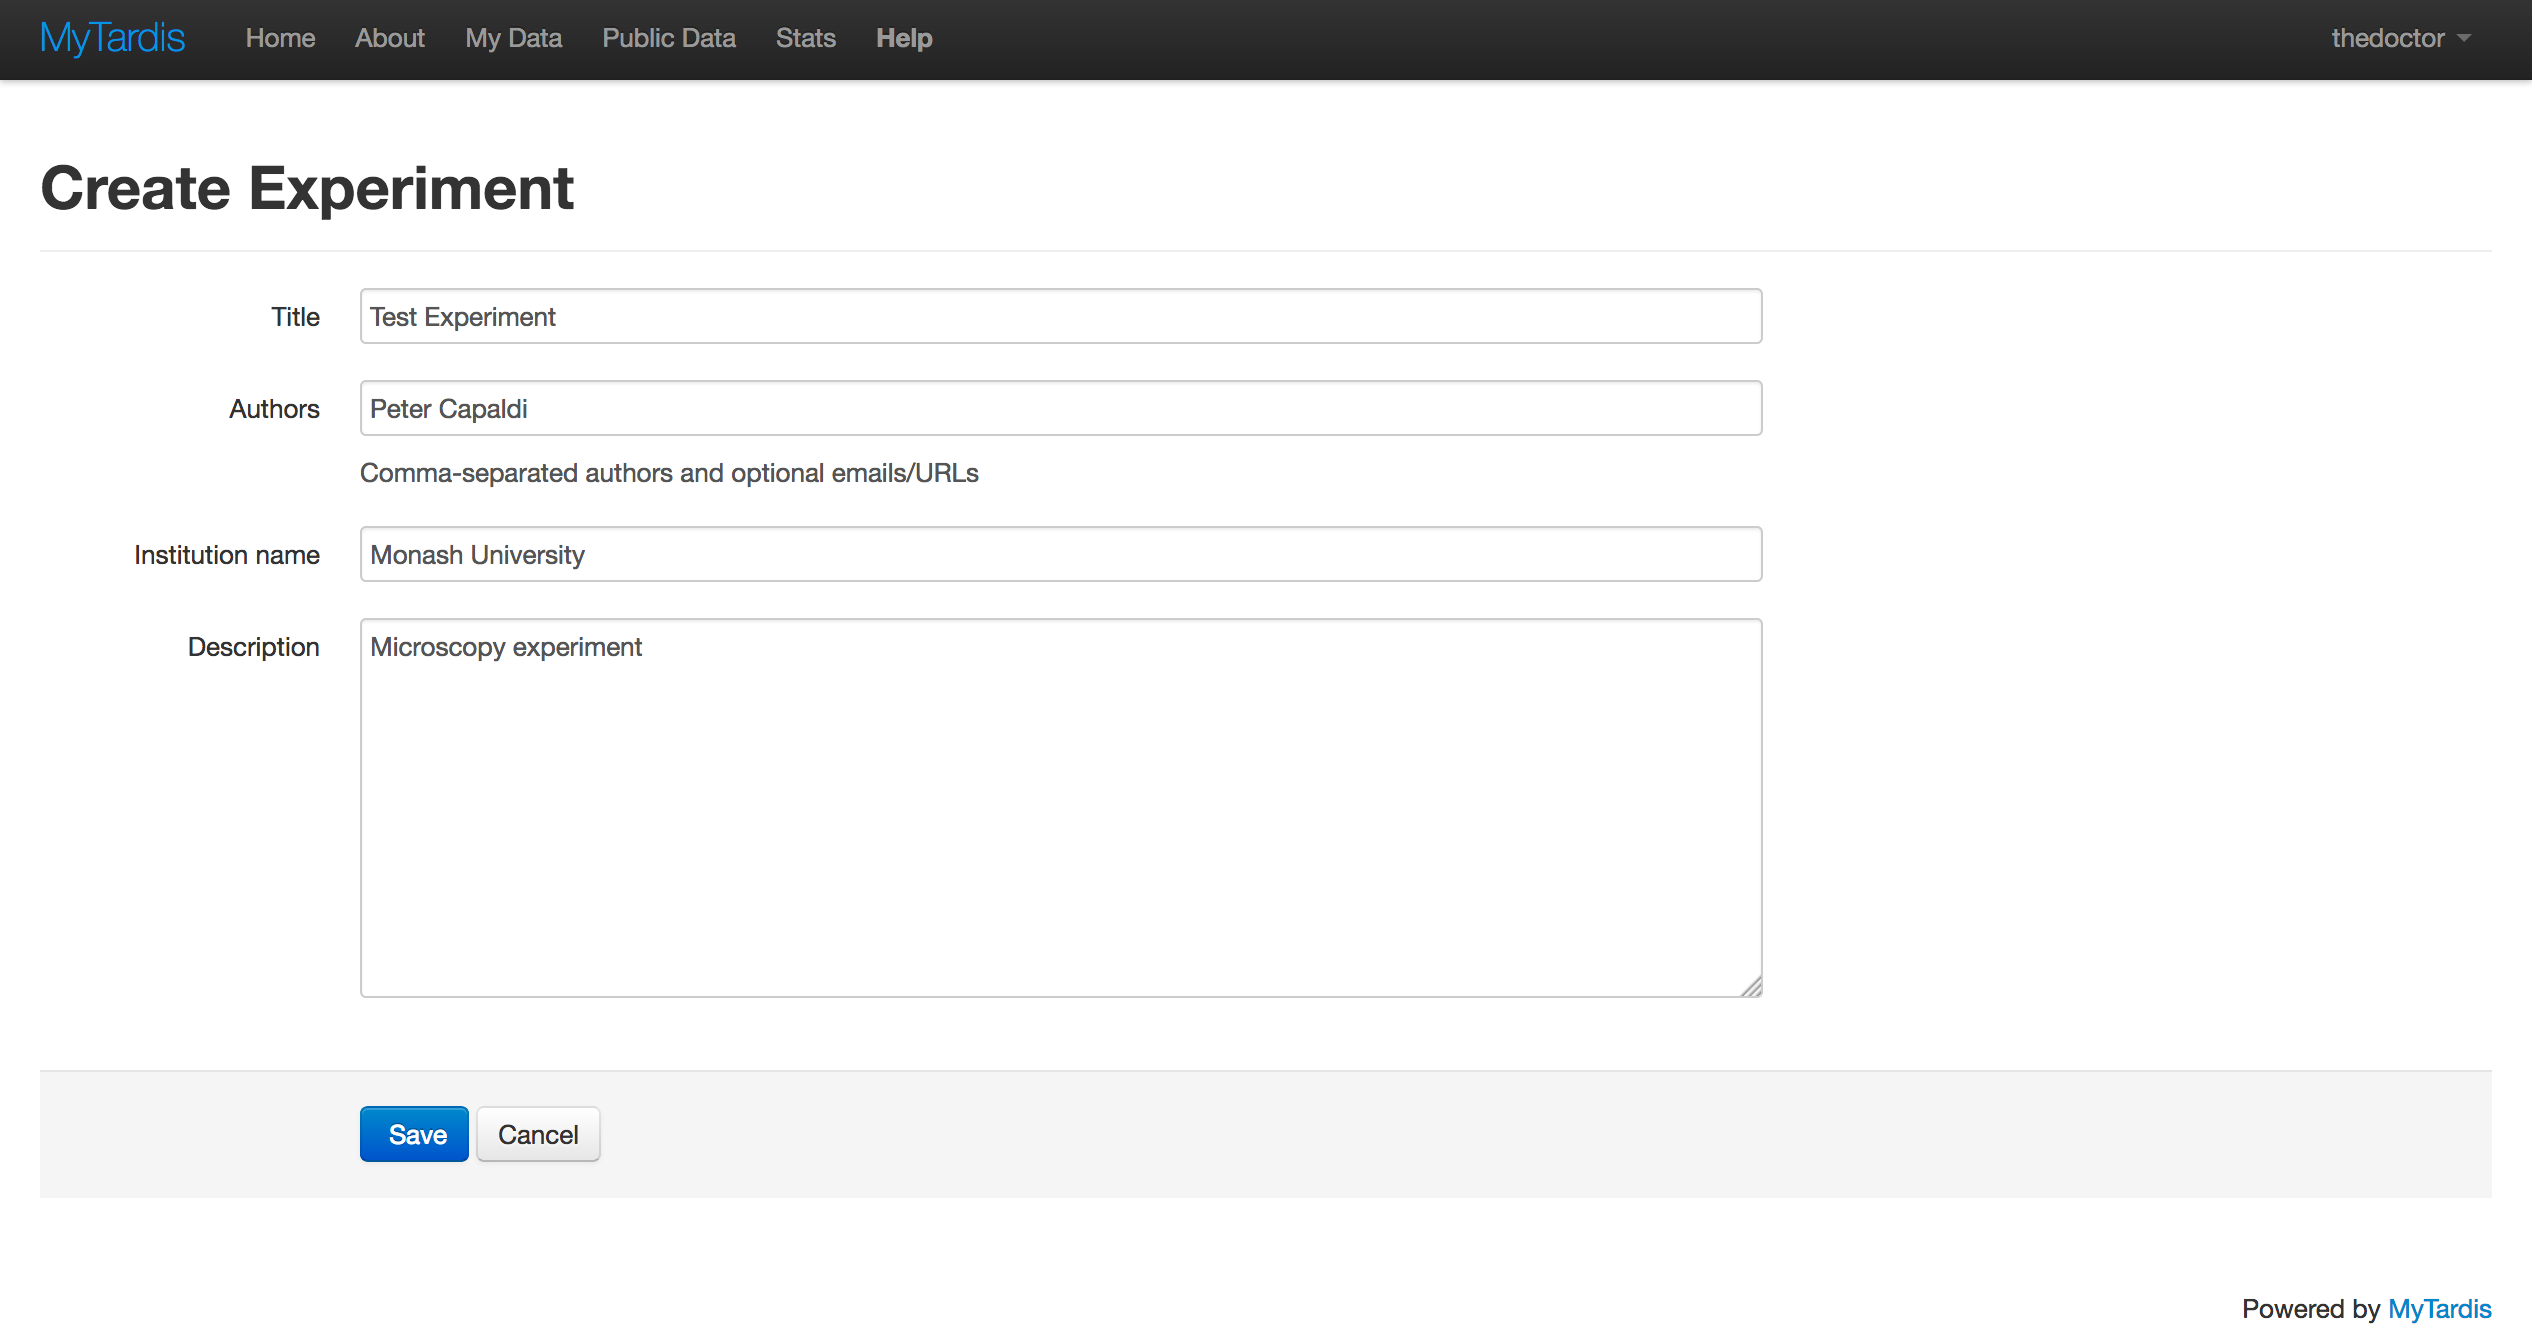
Click Save.
Adding Datasets
Datasets always have at least one parent Experiment. To add a dataset to an Experiment:
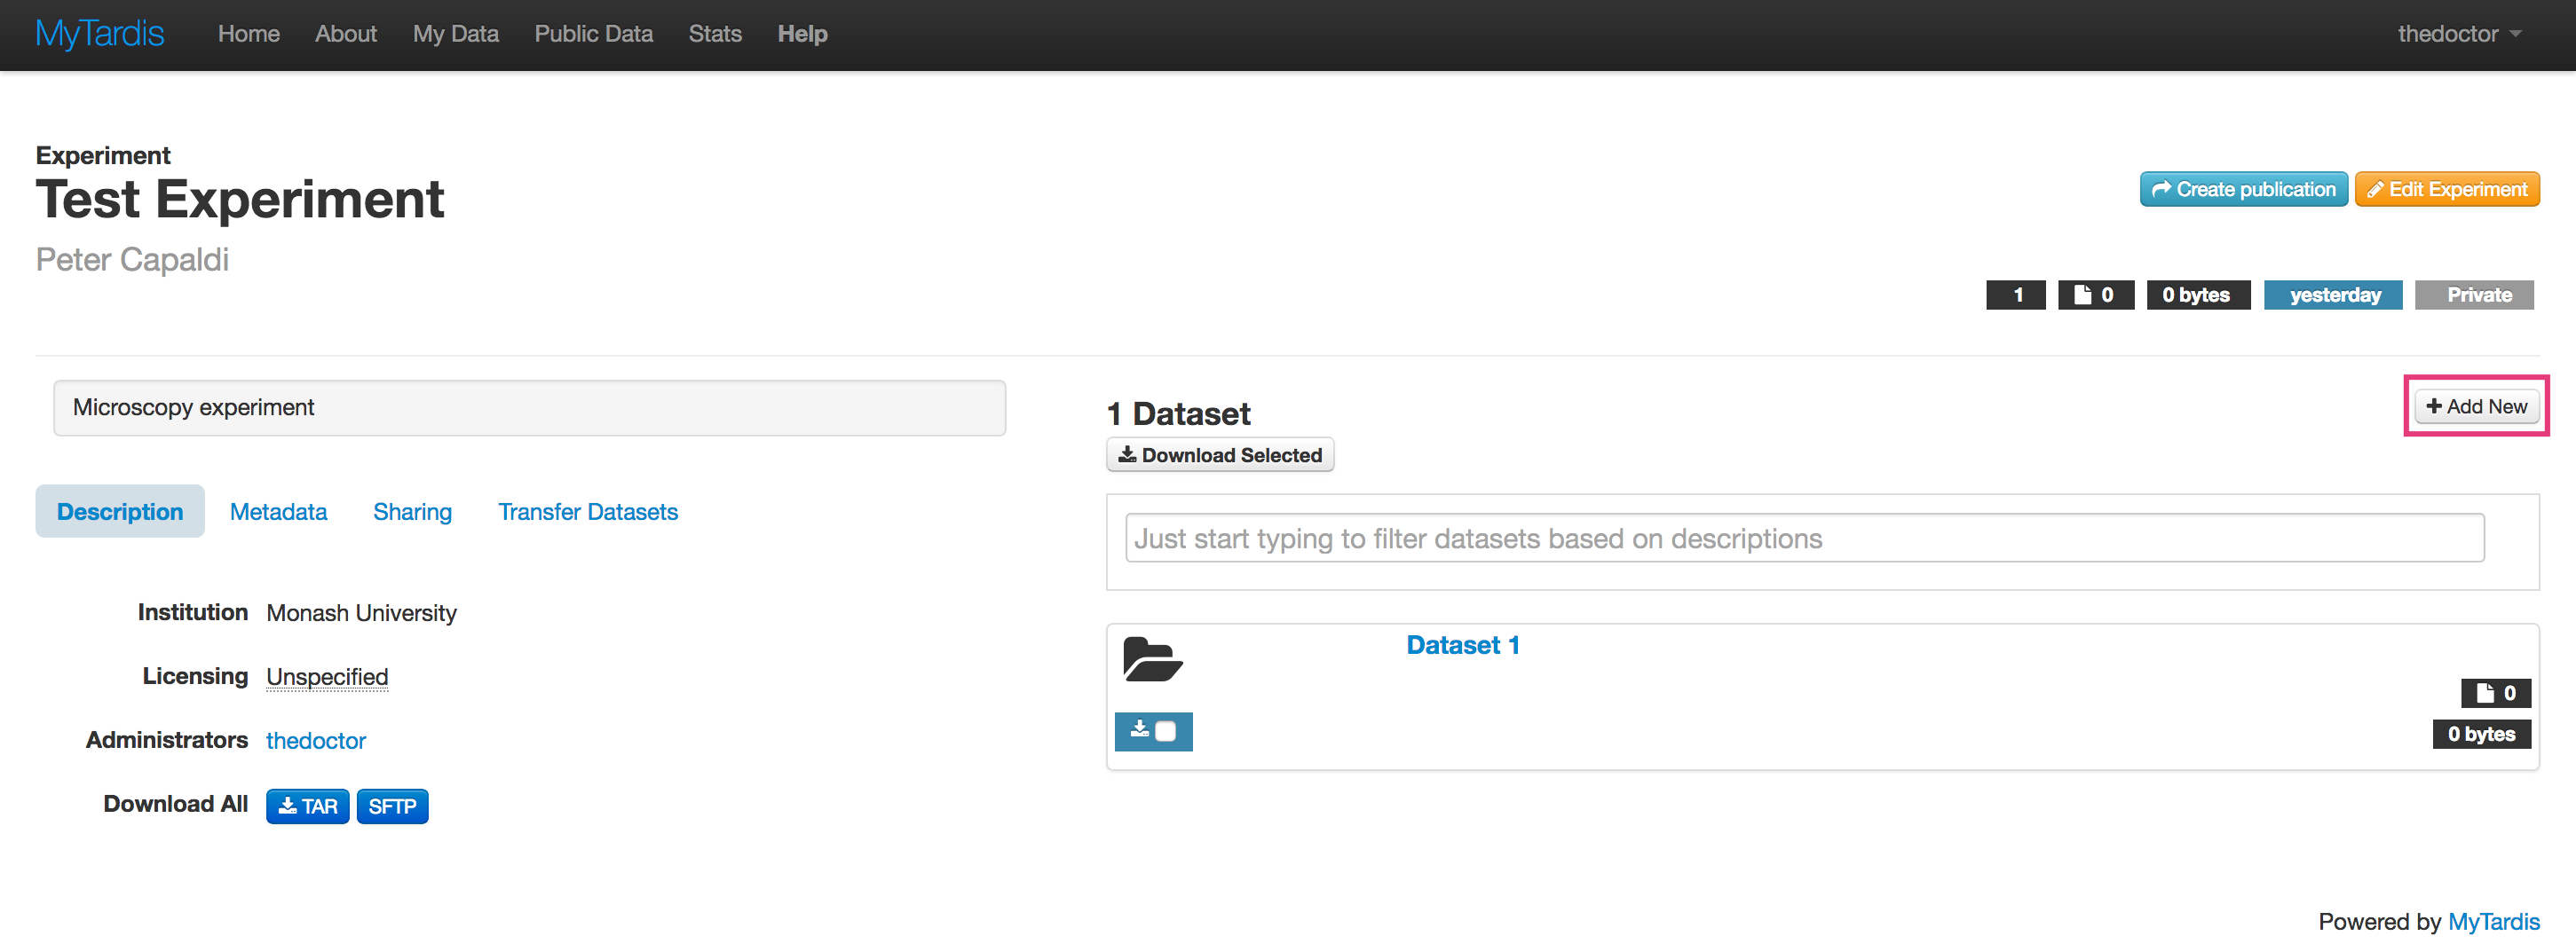
Navigate to the Experiment page into which you would like to add a dataset.
Click the + Add New button to the right of the page.
Fill in the ‘Add new dataset’ form. Note: The ‘Description’ field is actually the name of the dataset.
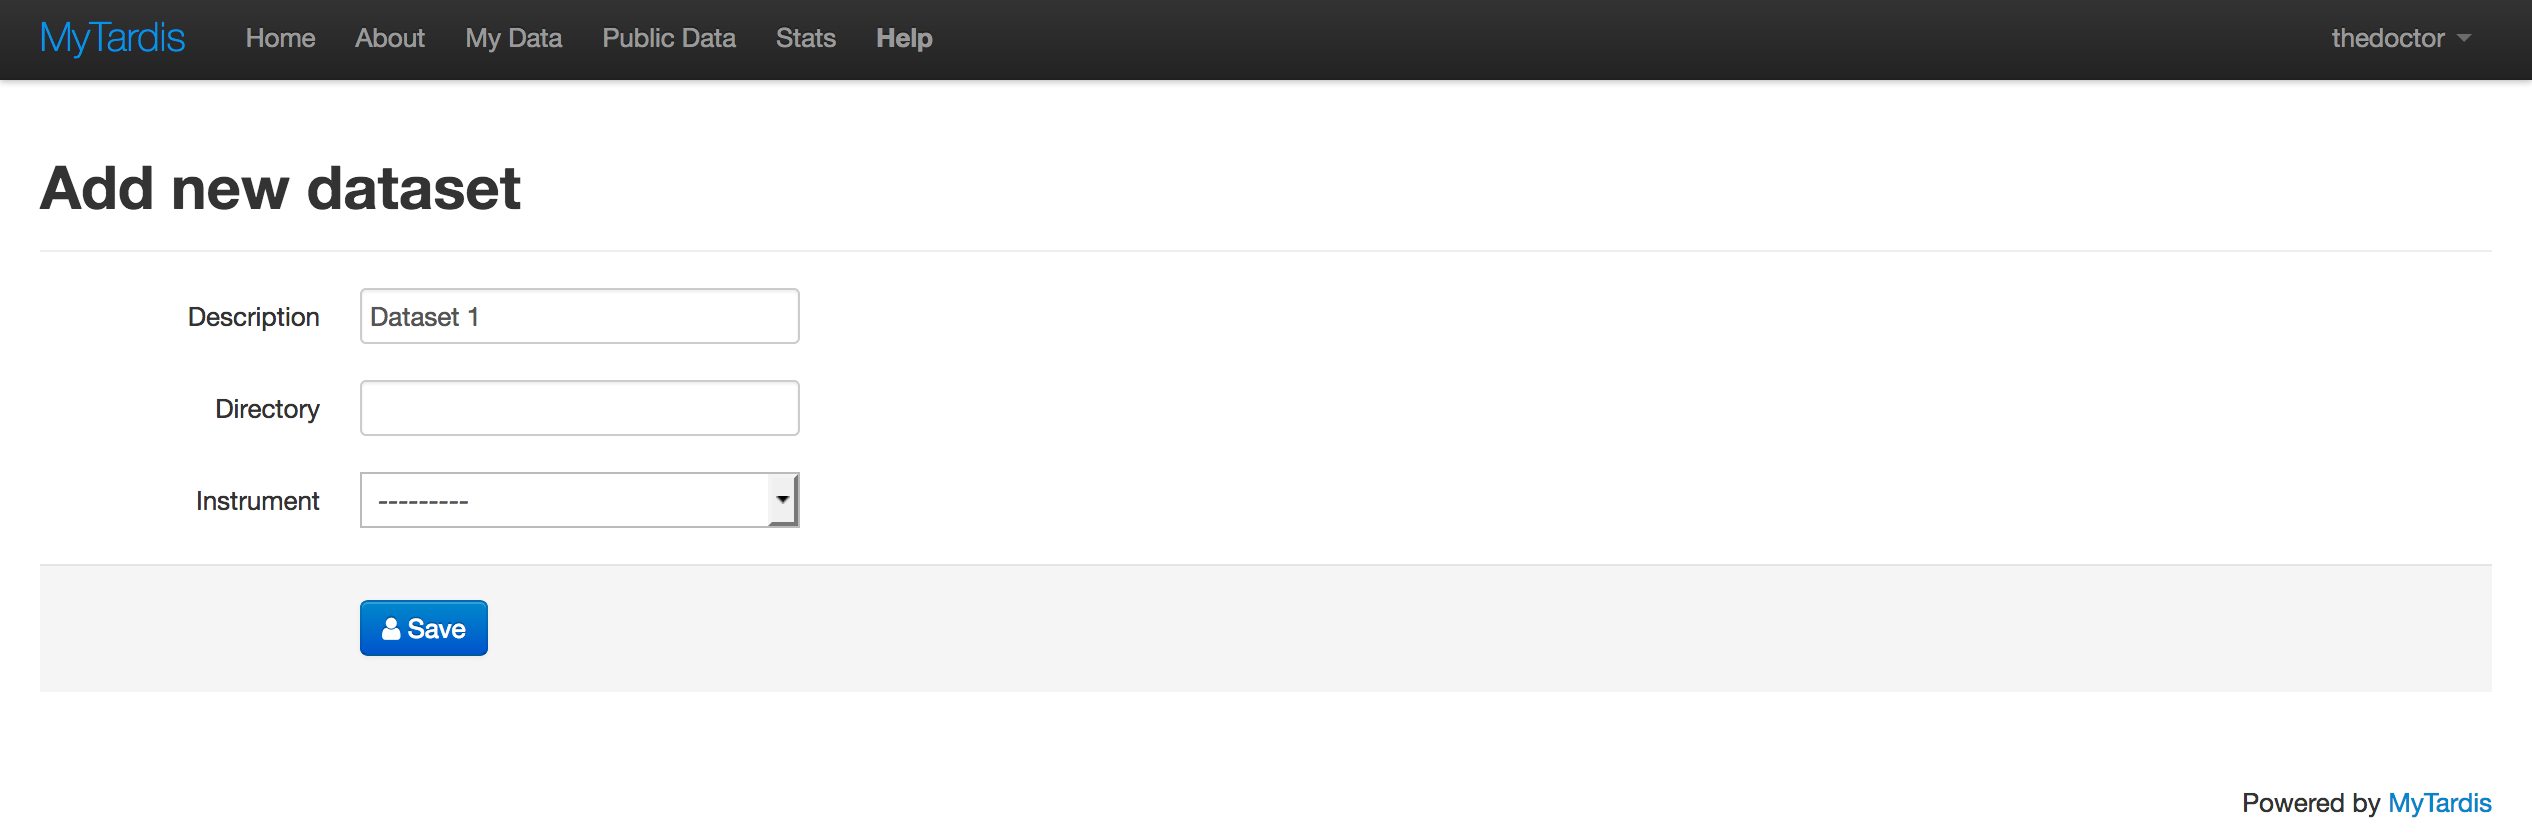
Click Save.
Adding Data Files
Data Files can be added to a particular Dataset from the Dataset page.
Navigate to the Dataset into which you want to add new files.
Click the green Add files… button to the right of the page.
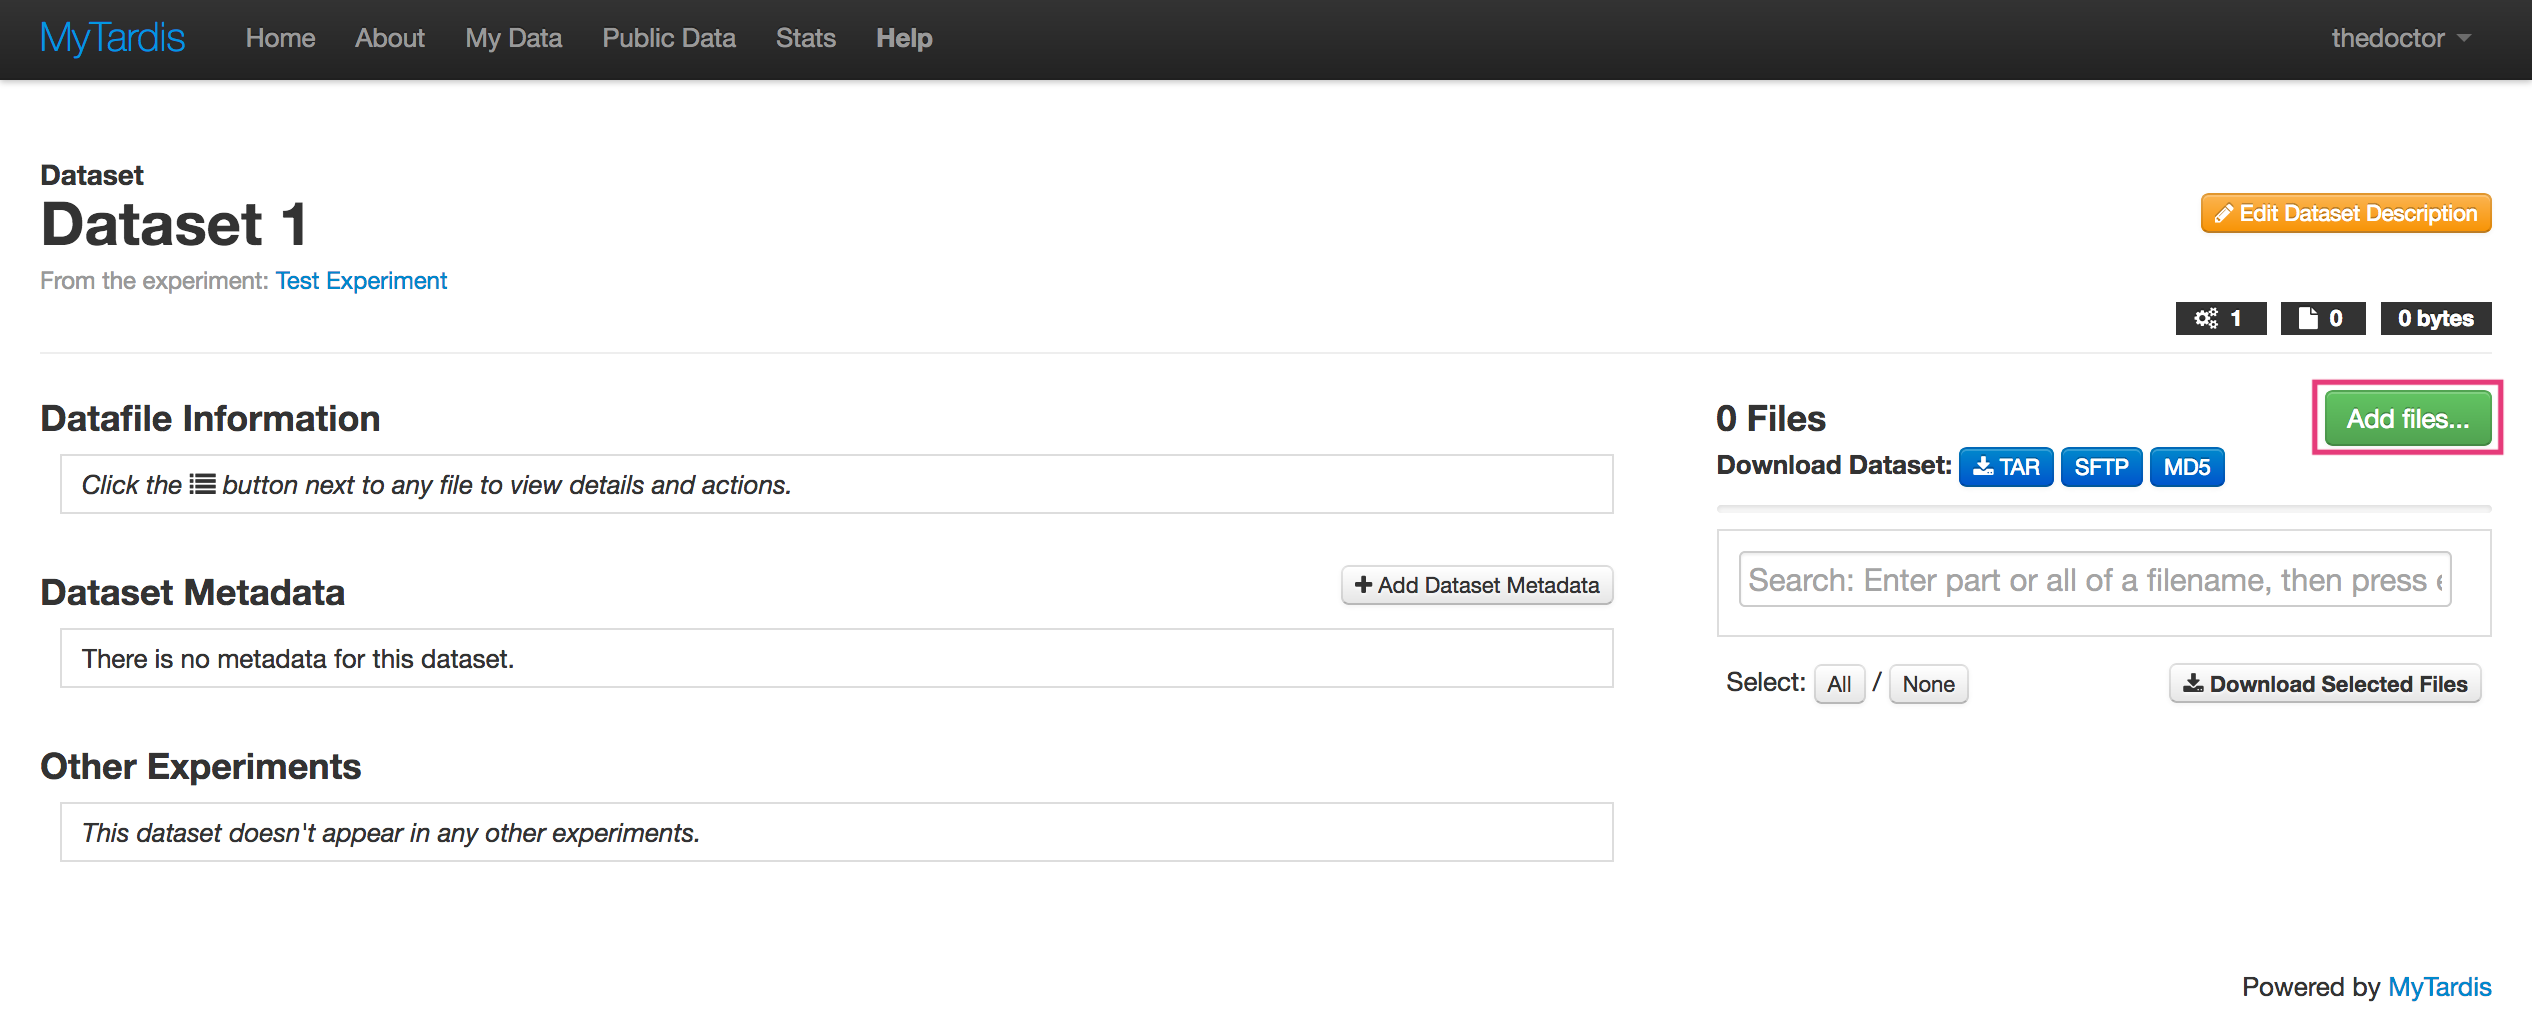
Select the files you want to add from the file selector dialog and Click Open. You can add multiple files by holding the “Shift” or “Ctrl” keys to select multiple files in the dialog.
Accessing Data
Download a Data File
Individual Data Files can be downloaded as follows:
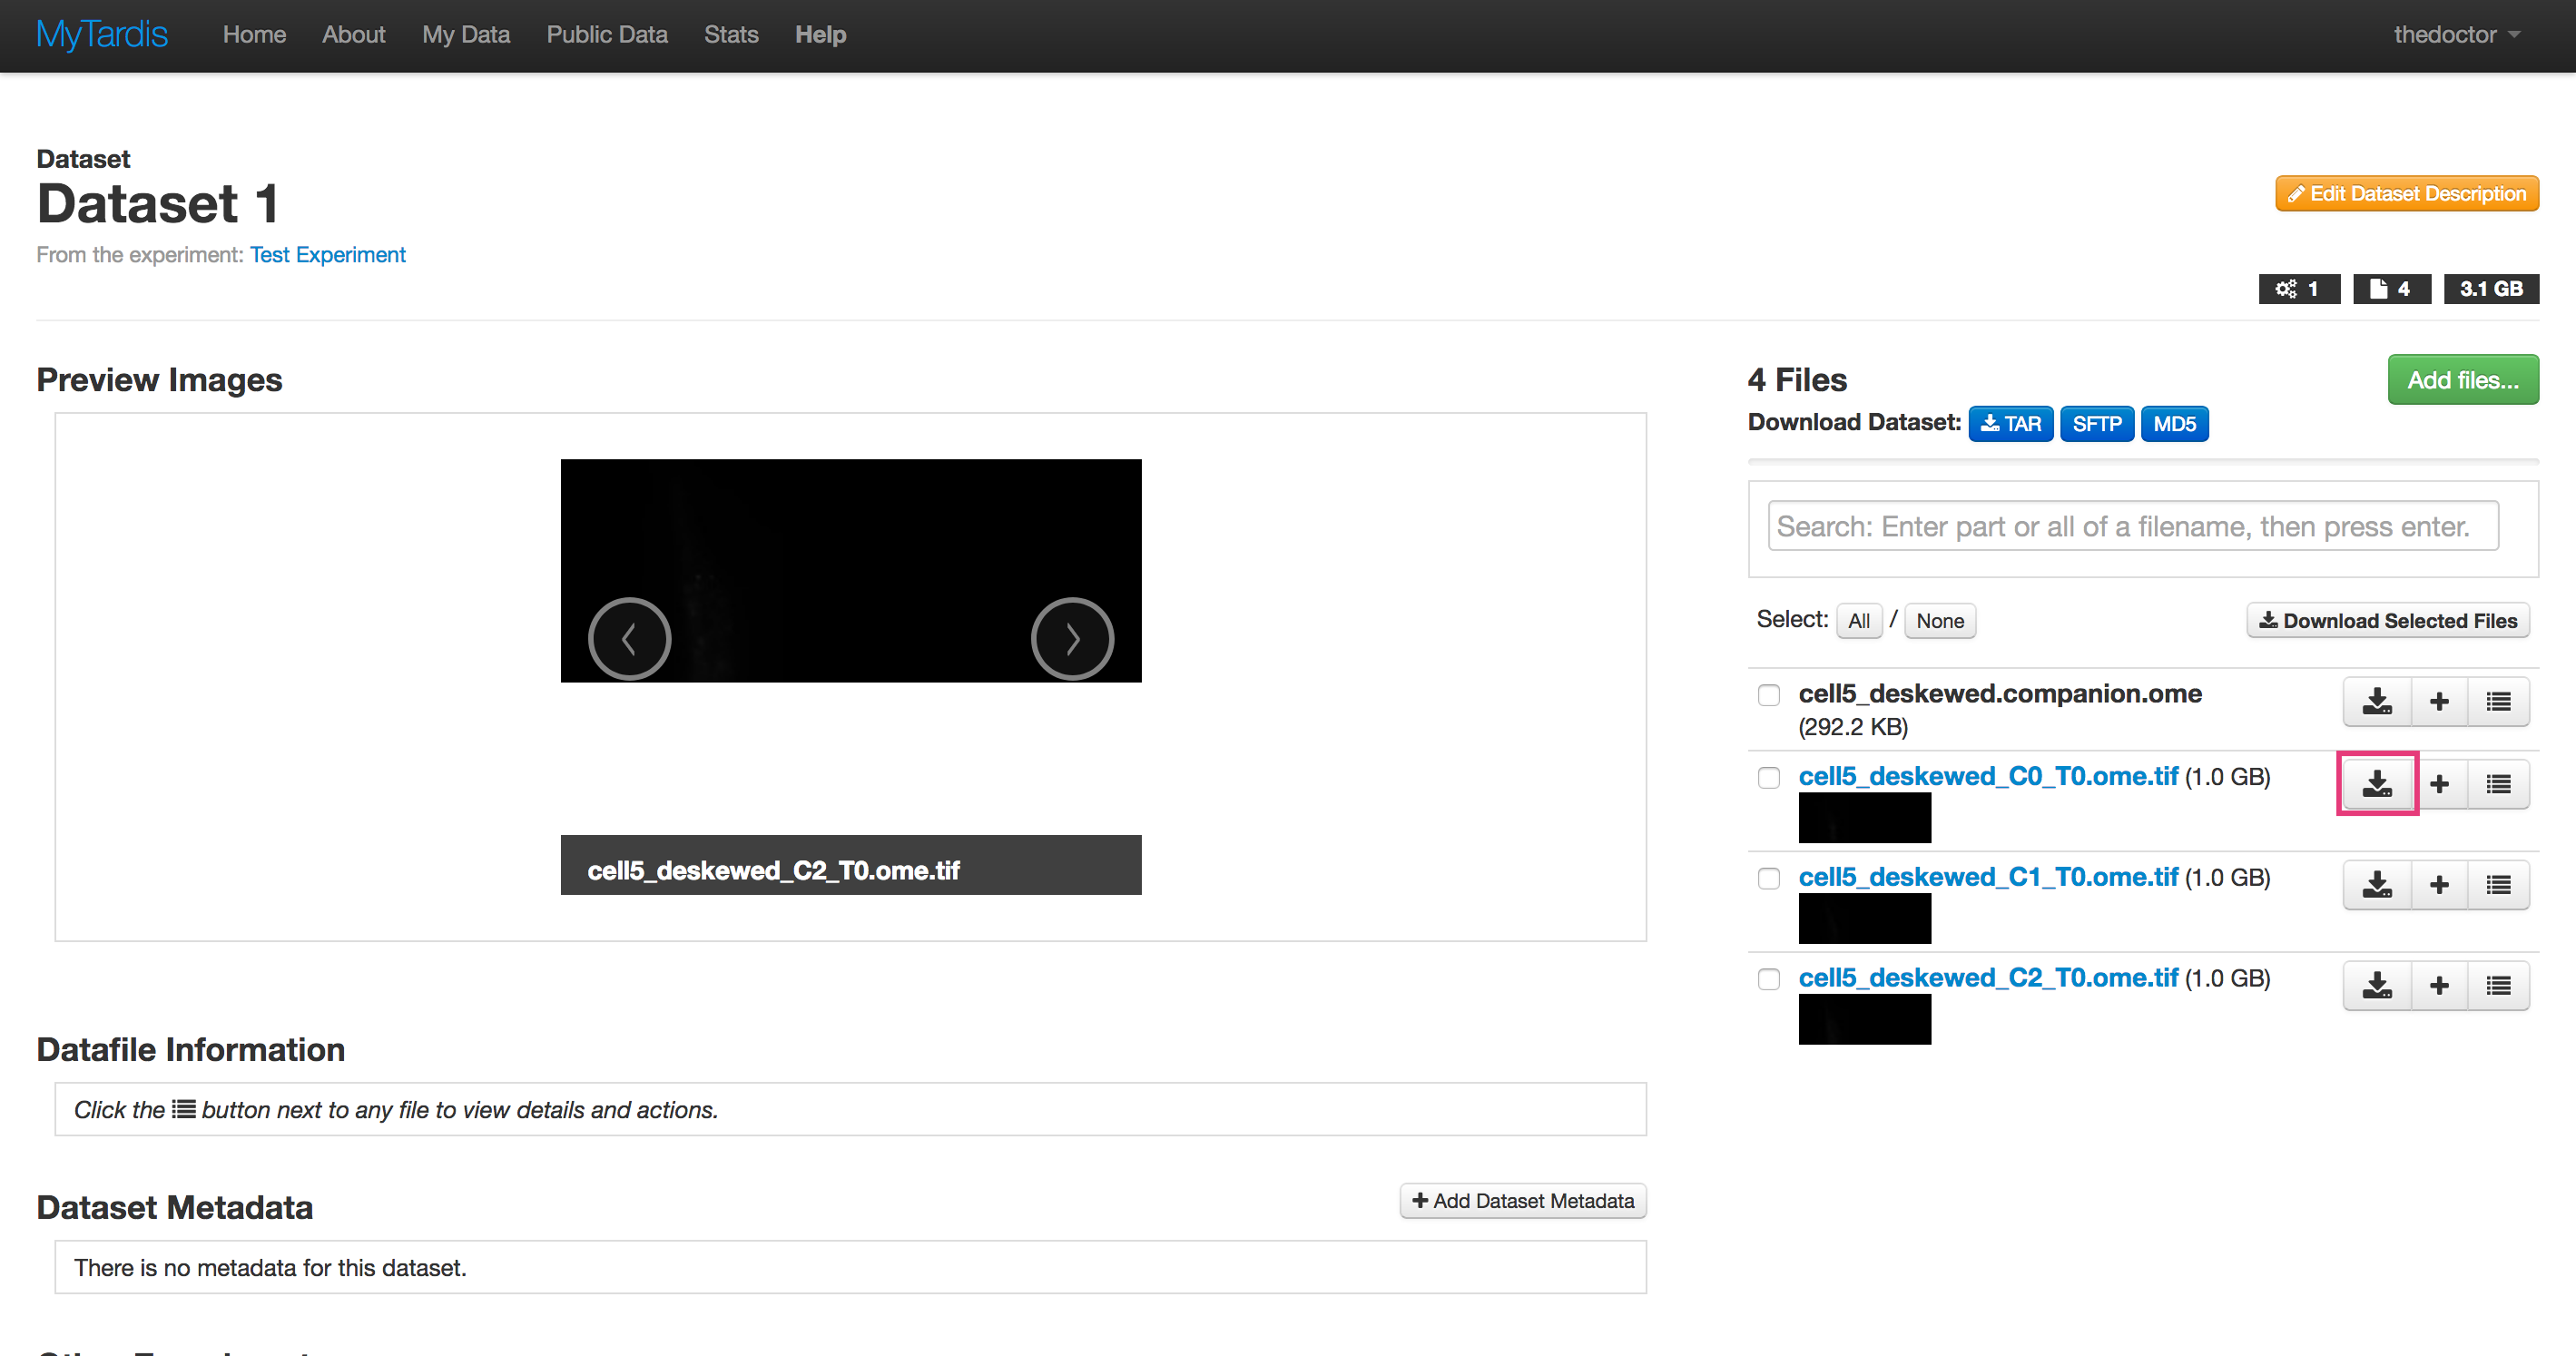
Navigate to the Dataset containing the Data File you want to download.
Click the Download button on the Data File you want to download.
Download a Dataset
Entire Datasets can be downloaded as a tar archive.
Navigate to the Dataset you want to download.
Click the tar button to the right of the page.
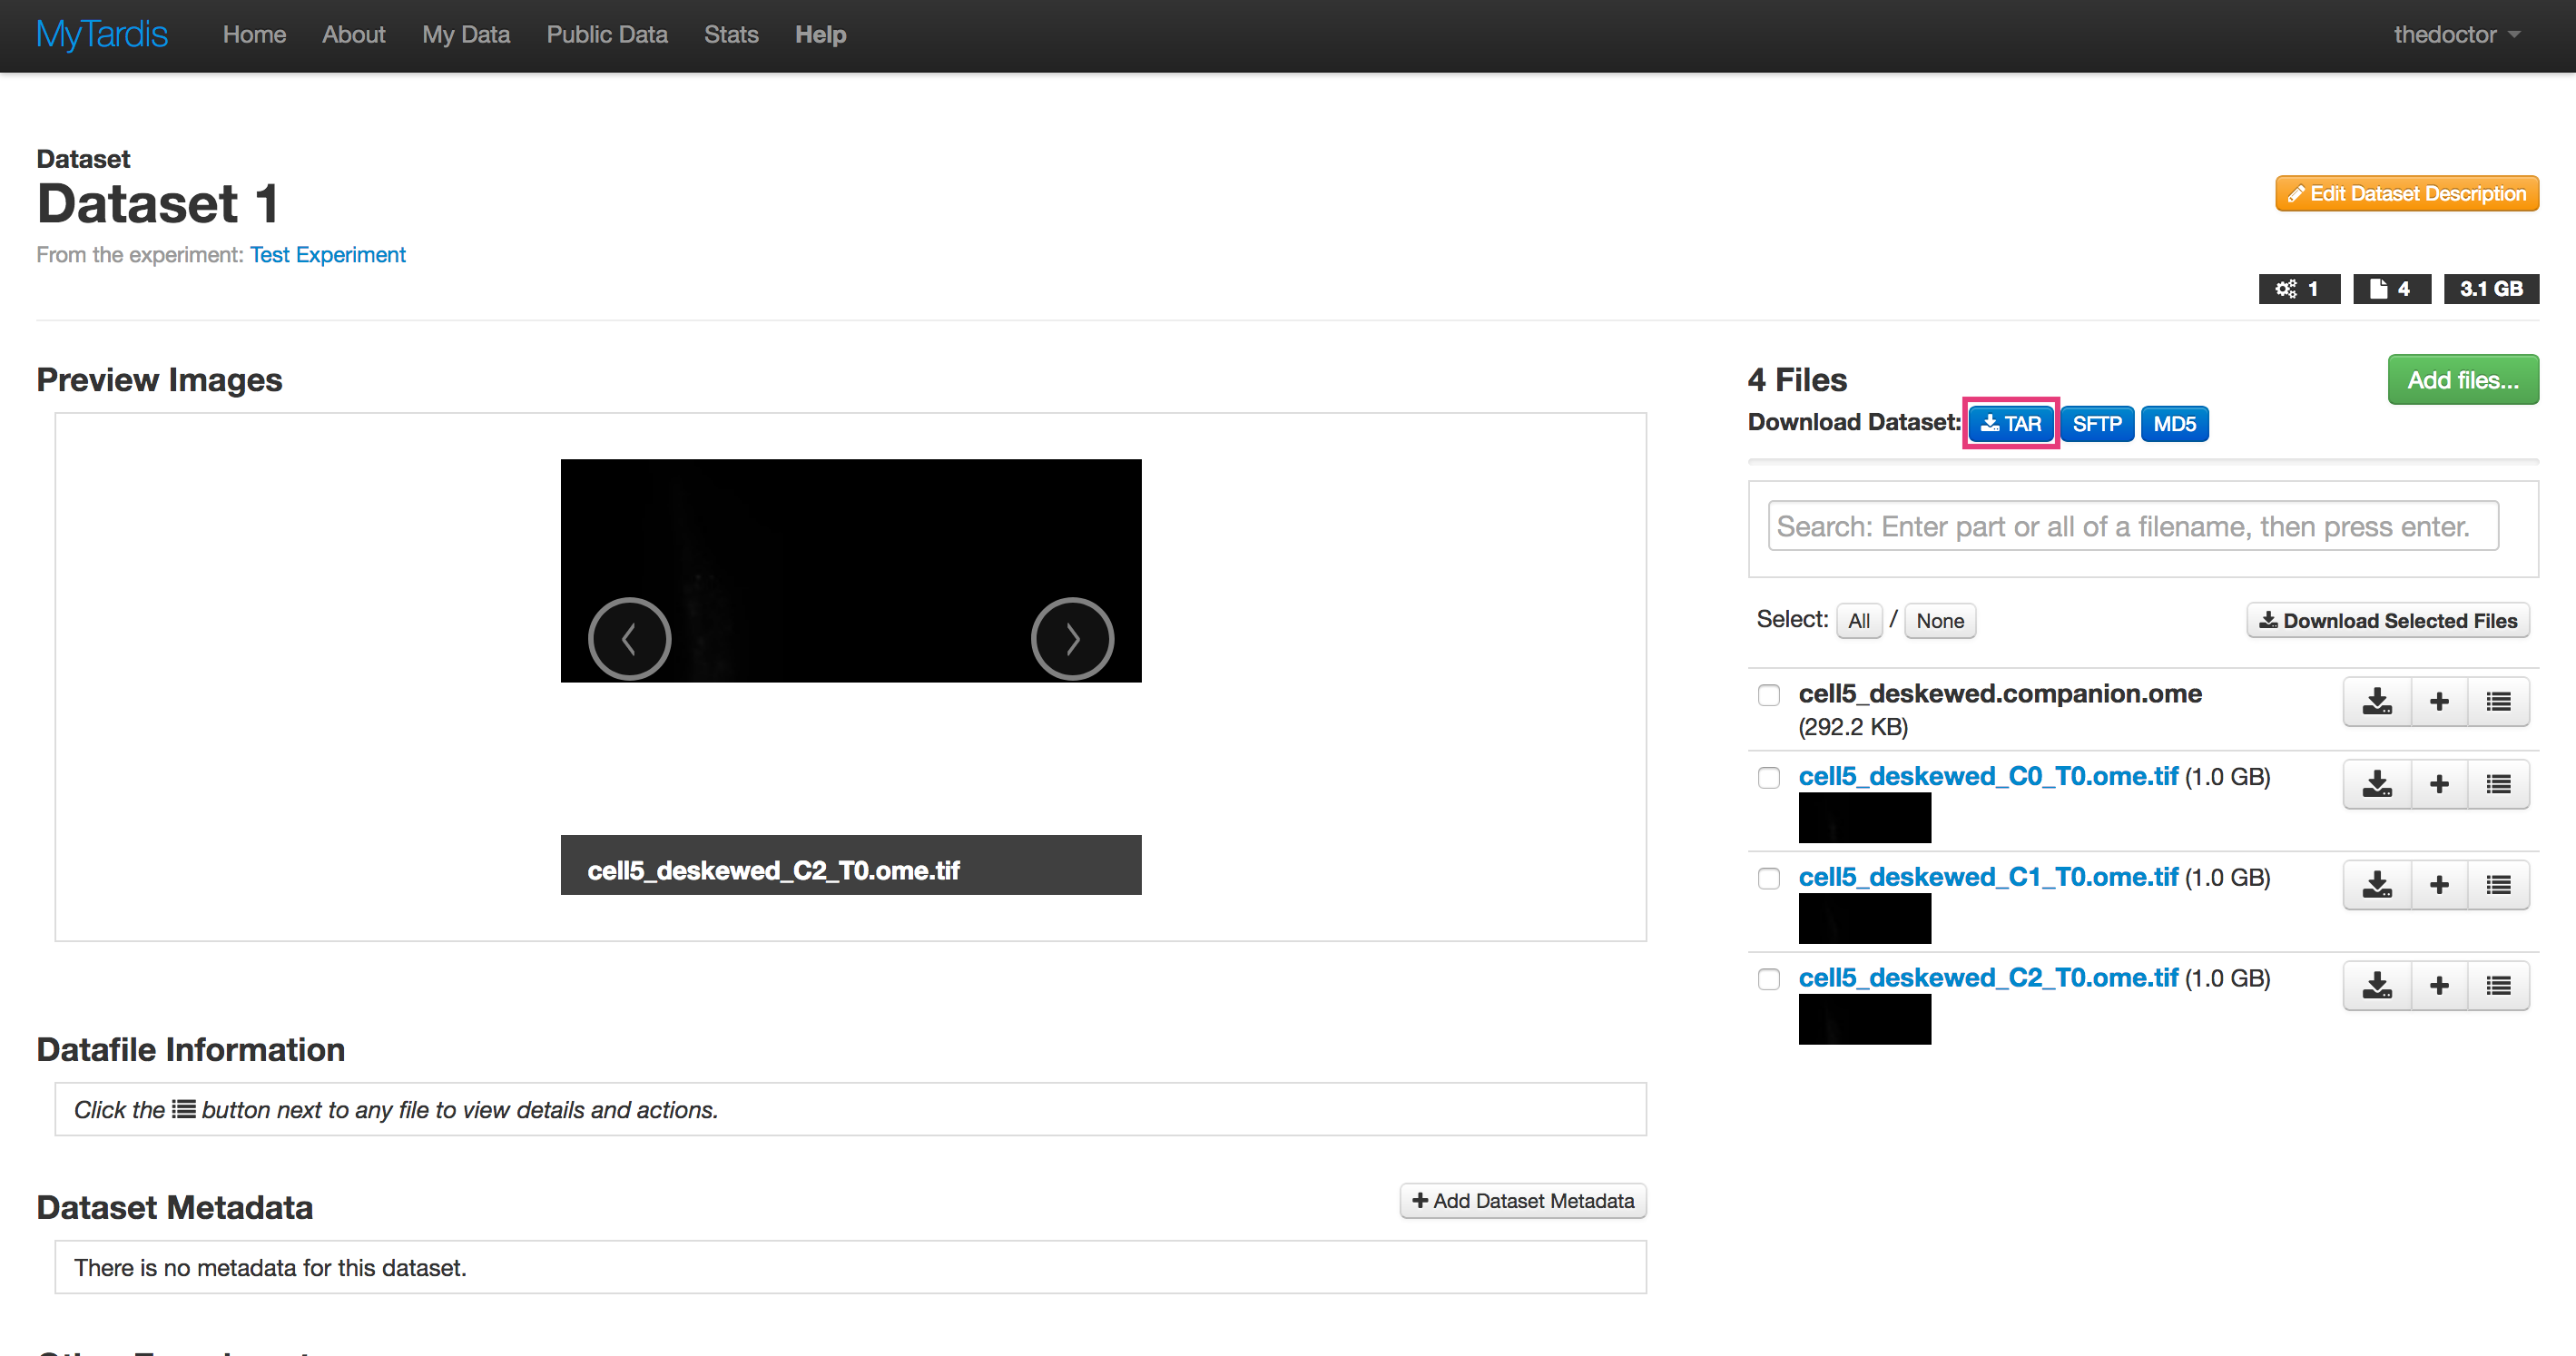
Note: tar is an archive format like zip that may not be familiar to Windows users and a default Windows installation may not have the appropriate software to expand tar archives. We suggest that users install 7-zip to expand tar archives from MyTardis.
Download an Experiment
Entire Experiments can be downloaded as a tar archive.
Navigate to the Experiment you want to download.
Click the tar button under the ‘Description’ section of the page.
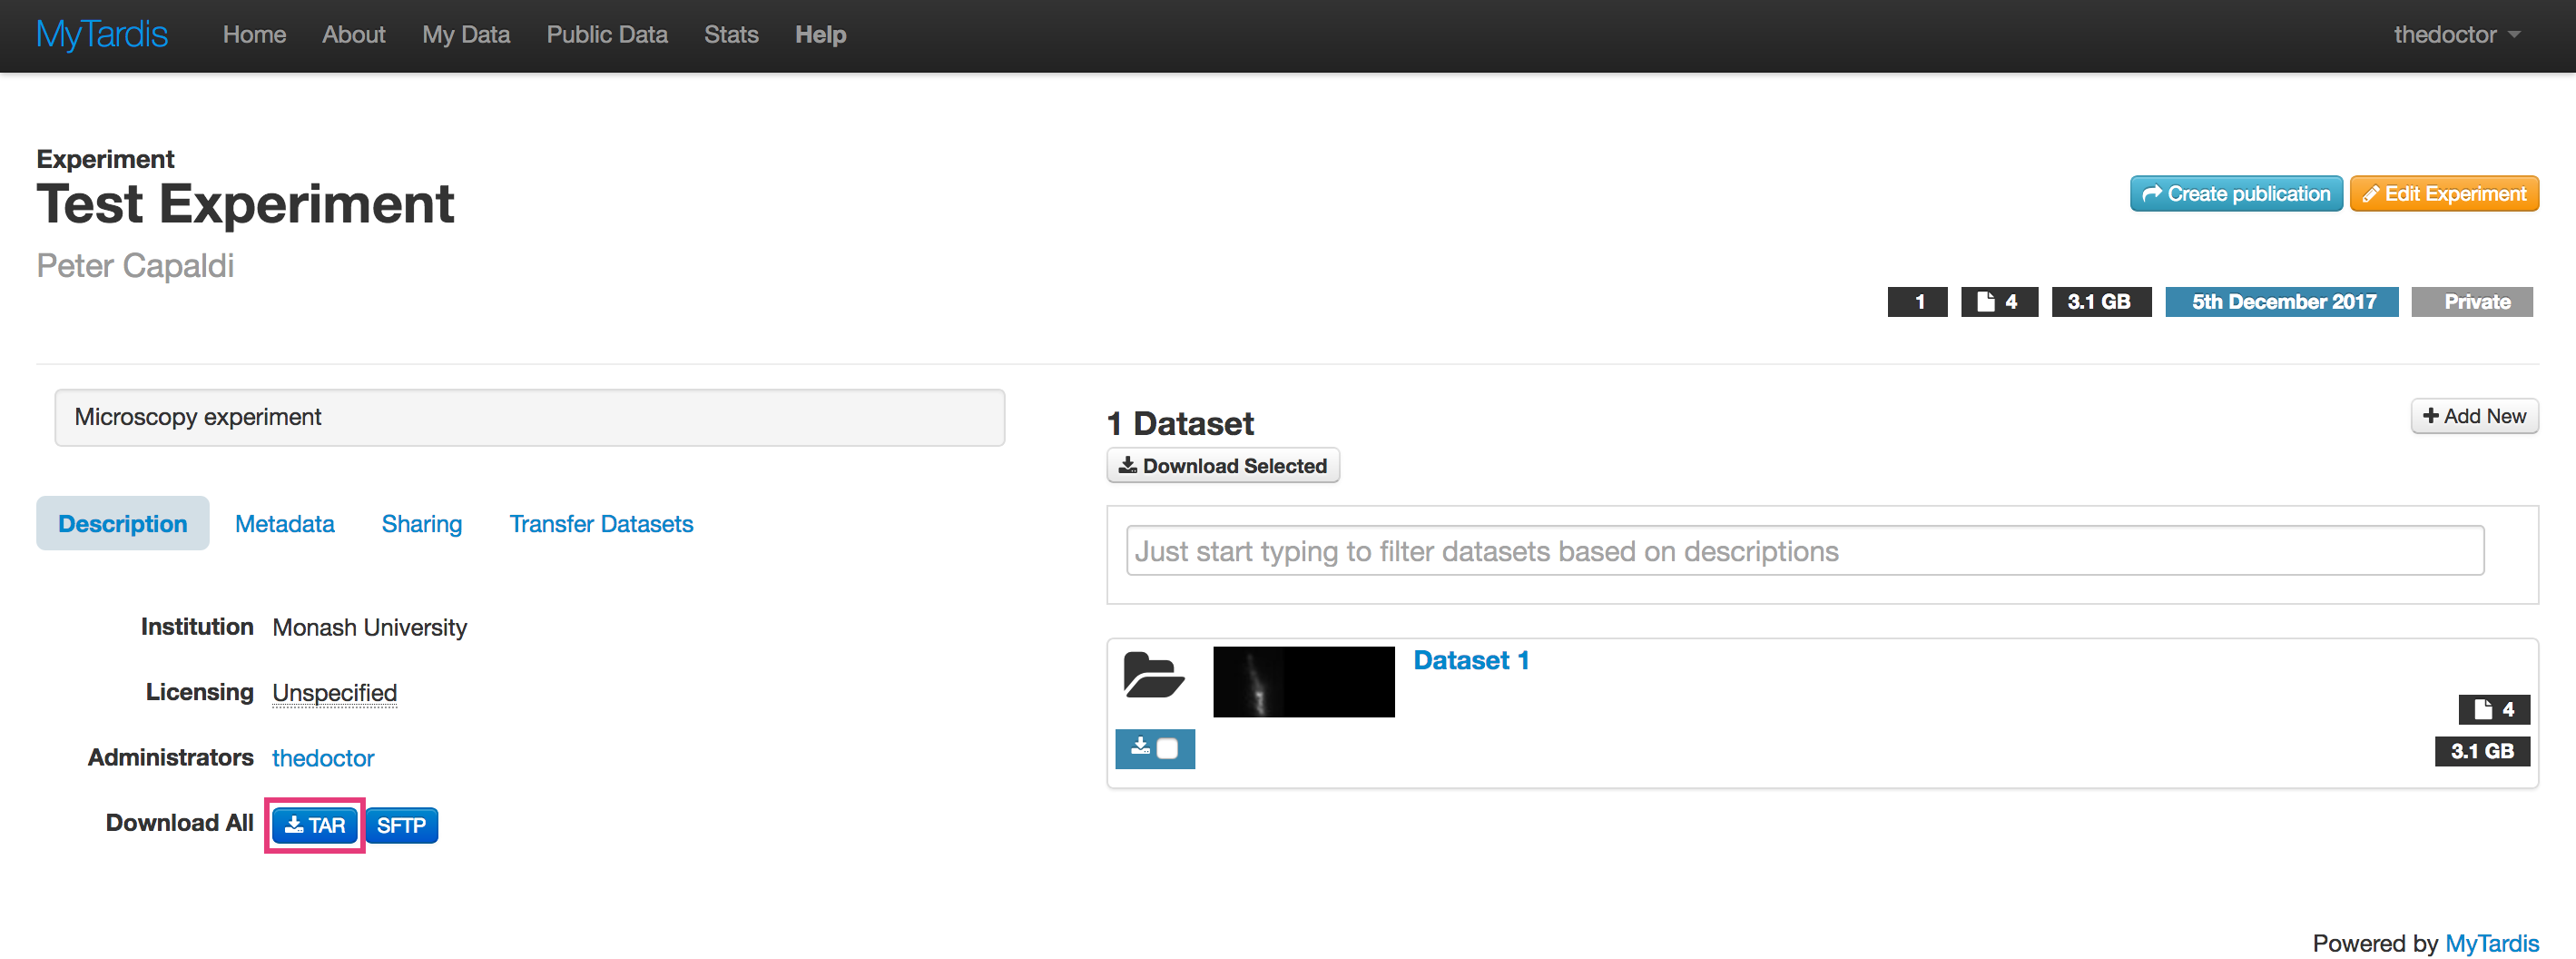
Note: tar is an archive format like zip that may not be familiar to Windows users and a default Windows installation may not have the appropriate software to expand tar archives. We suggest that users install 7-zip to expand tar archives from MyTardis.
Sharing and Publishing Data
MyTardis provides 3 primary mechanisms for sharing your data:
Sharing with another MyTardis user.
Sharing via a temporary (obfuscated) link.
Making data public.
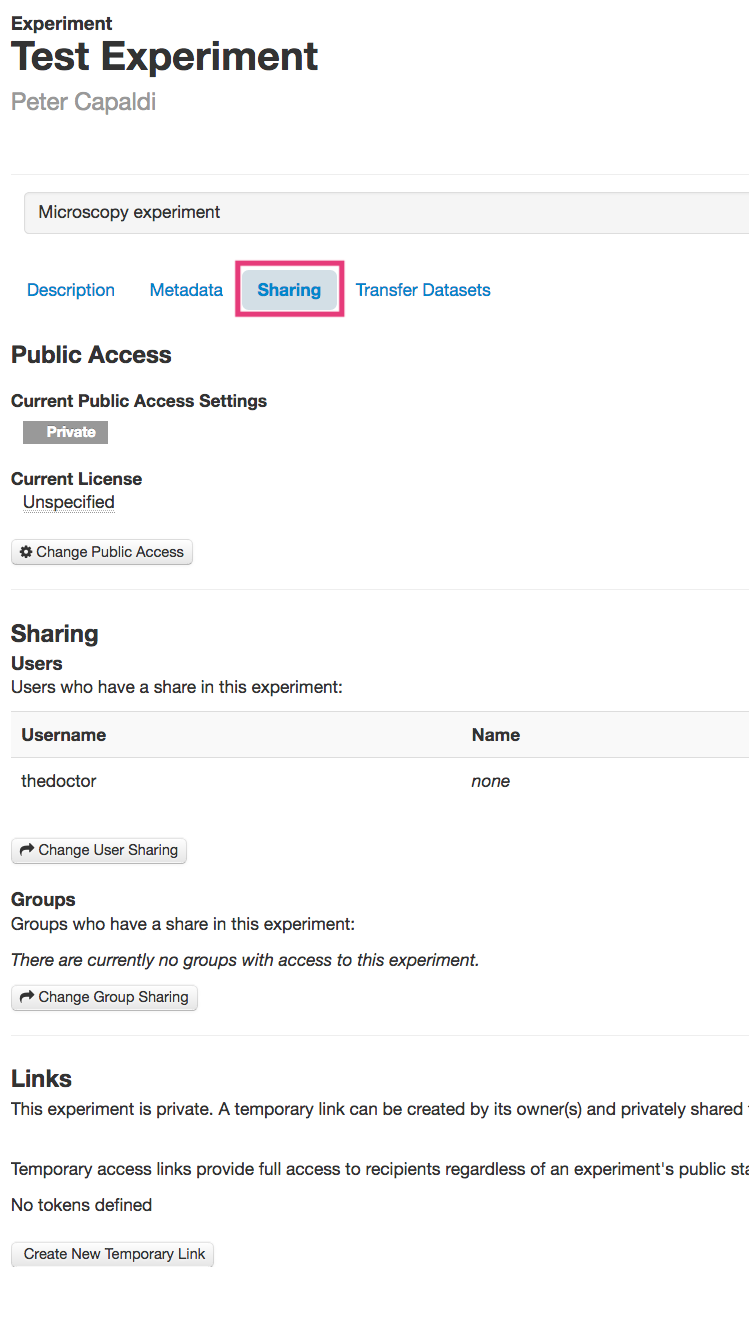
Data sharing is done at the Experiment level and you can find the options to share an Experiment under the Sharing tab on the left side of an Experiment page.
Sharing Data with Another MyTardis User
To share an Experiment with another MyTardis user:
Navigate to the Experiment you want to share.
Click on the Sharing tab on the left side of the page.
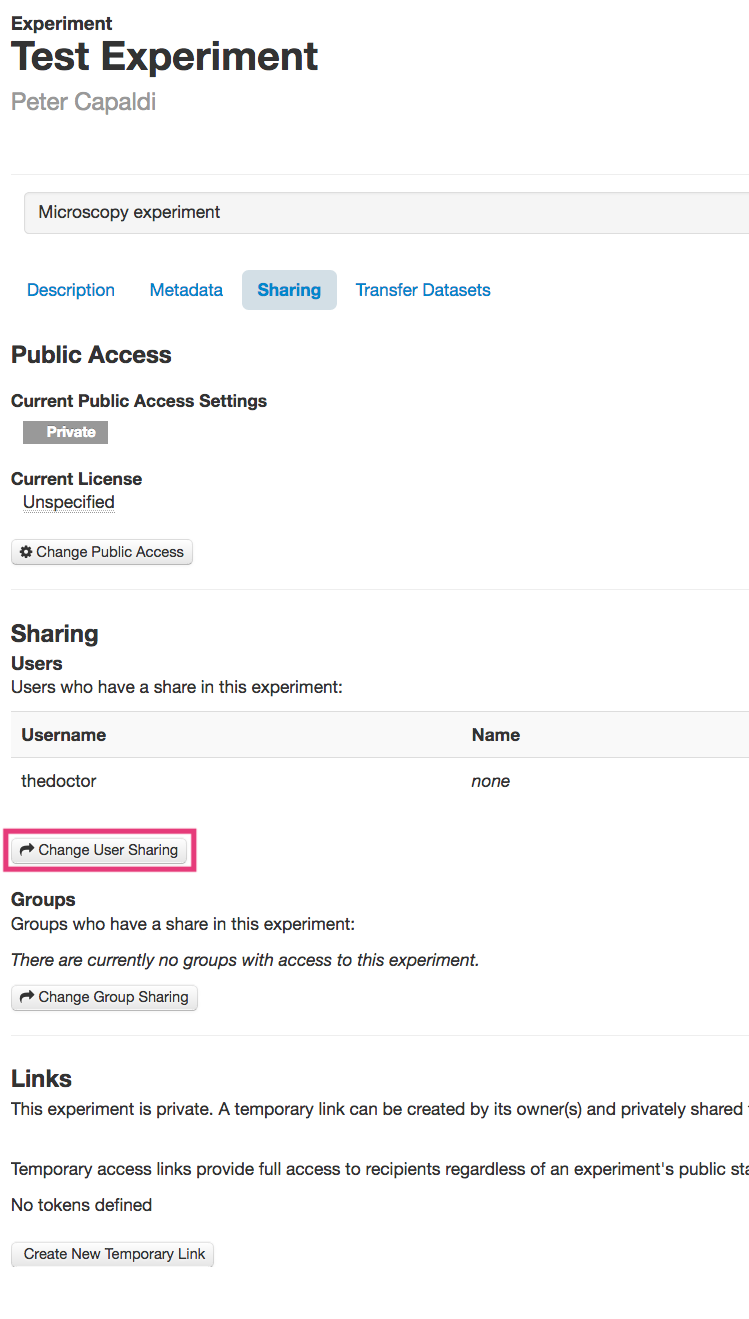
Click the Change User Sharing button.
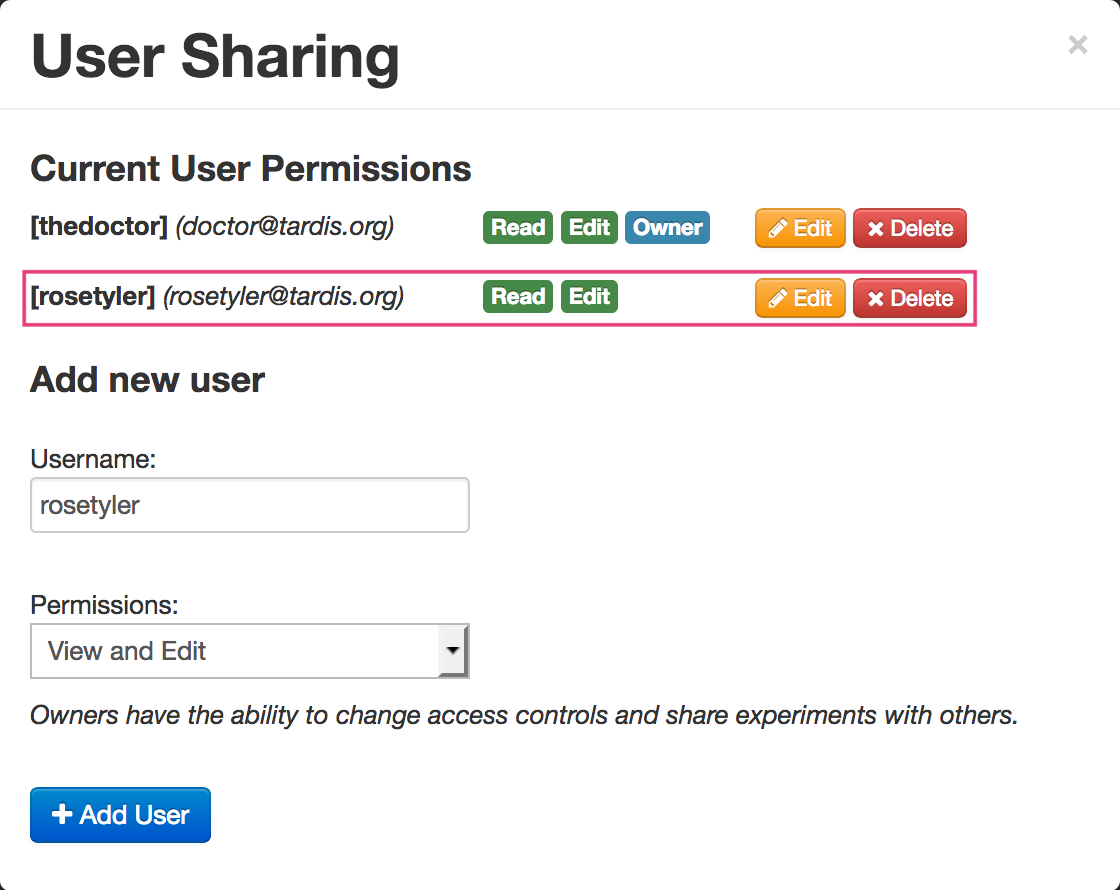
Enter the Username of the user with which you want to share the data.
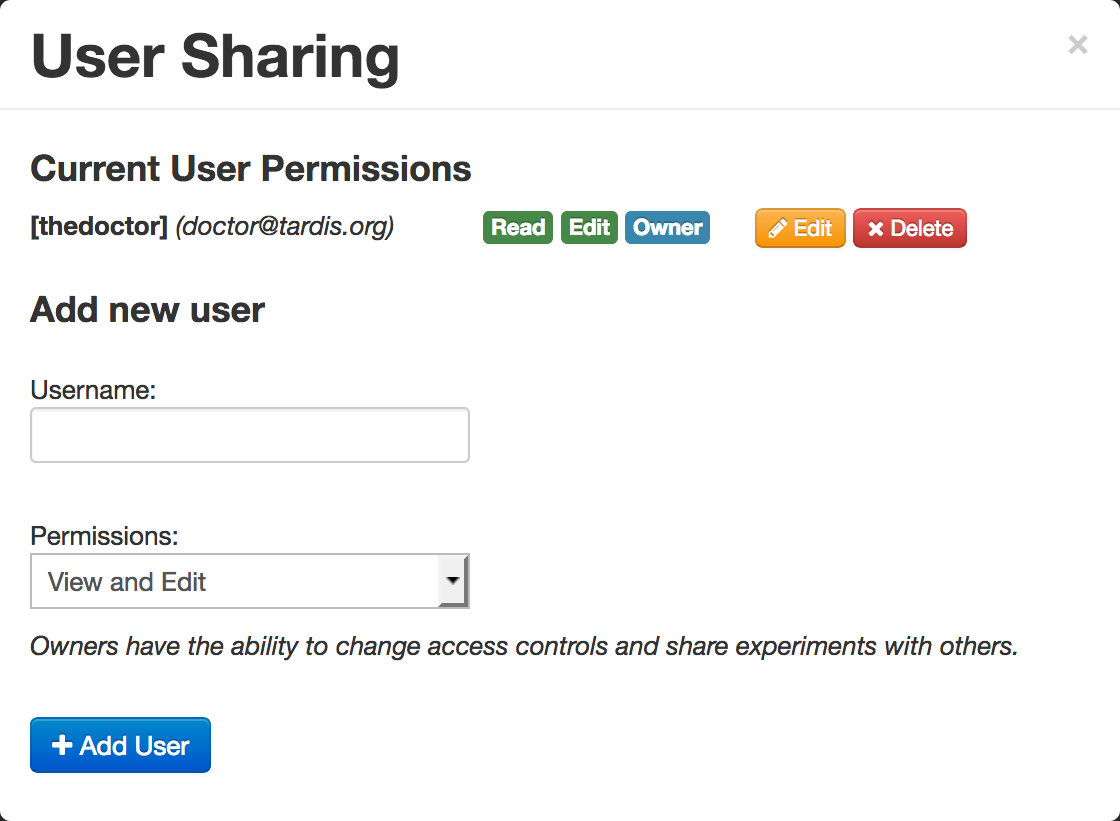
- Note: Entering the users name or email address with activate autocomplete,
which helps to find the username of the user.
Select the permissions you’d like to give the user from the Permissions dropdown.
Click the +Add User button.
You should now see a new entry under the Current User Permissions section showing the user you’ve shared the Experiment with and the permissions you’ve given them.
Sharing Data via a Temporary Link
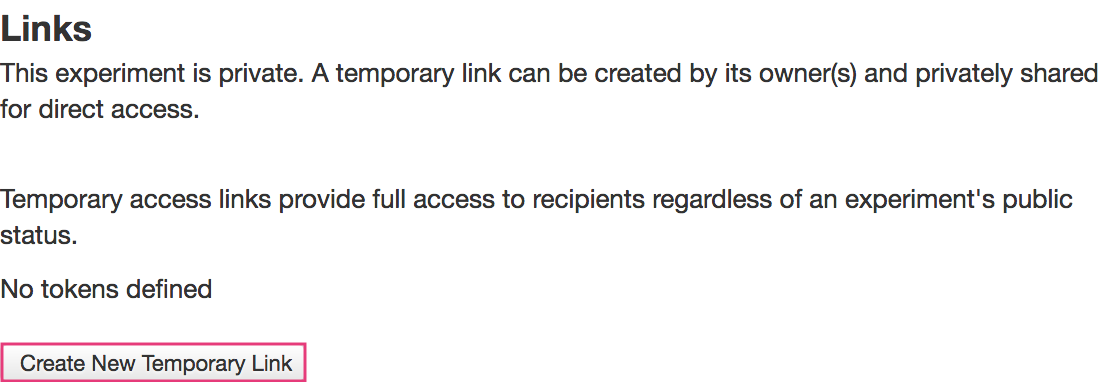
You can also share Data in an Experiment via a temporary (obfuscated) link. Temporary links expire after 1 month or can be deleted manually. Note: temporary links are not protected (i.e., anybody with the link can access the data); however, they are obfuscated and are thus difficult to find without prior knowledge of the link.
To share an Experiment via a temporary link:
Navigate to the Experiment you want to share.
Click on the Sharing tab on the left of the page.
Click the Create New Temporary Link button in the links section.
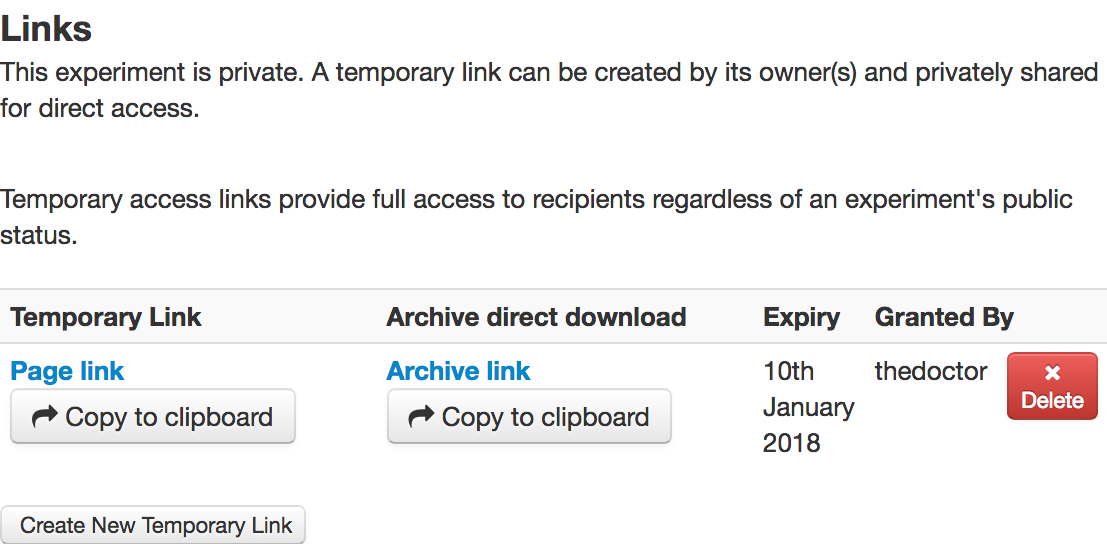
You should now see a new entry in the Links section. The new entry will provide links to both the Experiment page and a direct download link. These can be copied to the clipboard using the relevant buttons. These can then be shared with collaborators using email etc.
Publishing Data
Access to an Experiment in MyTardis is set to “private” by default and no license is attached to the data; however, MyTardis allows data from an Experiment to be made publicly available with an appropriate license. To make an Experiment publicly available:
Navigate to the Experiment you wish to publish and activate the Sharing tab to the left of the page.
Click the Change Public Access button. This will activate the Public Access dialog and display the current status of the data.
Select Public in the “Public access” dropdown menu.
Select an appropriate license from the list of licenses presented. In the following screenshot, a “Creative Commons Attribution” license is selected; however, your choices may be different as licenses are configured by your service provider.
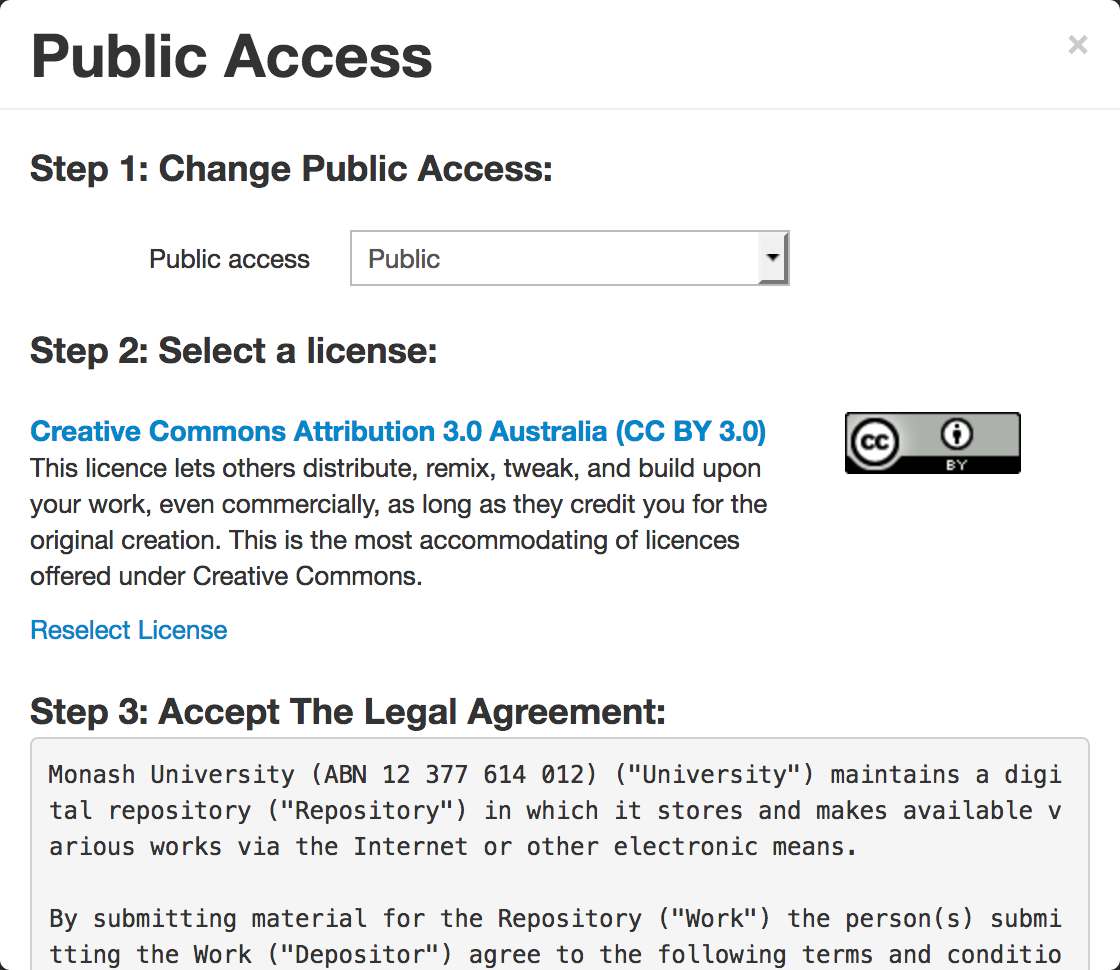
Agree to the “Terms of Publishing” of your service provider.
Click Confirm